As we shared at the end of 2020, our plans for 2021 include a new studio for Two Hands to call home. We have officially moved and are in the midst of making our new studio into all that we know it can be. And, while we’ve been sharing sneak peaks at our studio renovation for those who follow along with our Instagram stories and
e-newsletters, we’re excited to share some real details behind our ongoing updates. Like our clients, we have a budget, a timeline and a long list of needs and wishes for what we can create in our new space. So, as with any renovation, we are taking on the update in phases. Here, we’ll share with you all the fun of Phase I.


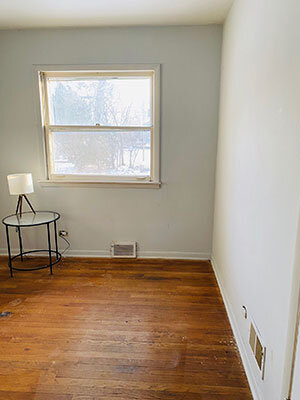
We saw so much potential! (And, some time when it would get worse before it got better.)
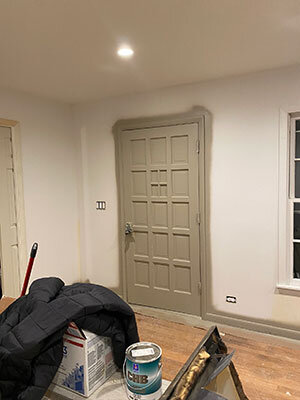
Structurally, we are lucky that our gal is sturdy and most changes are just cosmetic. Plus, with the abundance of snow on the ground, exterior work has to wait, so Phase I was focused on getting cleaned up, functional and pretty on the inside. This included moving and adding some walls, refinishing floors, a full bath reno, a LOT of paint and some upgrades in hardware and lighting.
As always, layout is a consideration from the hop. To create better flow between our meeting space and sample room we removed a closet and opened up a doorway. This also means more light flooding both spaces, which has resulted in some magical days even in the dead of winter when we don’t even have to turn on the overhead lights. We also added a wall with some pocket doors to create flexible separation from the kitchen. It’s counterintuitive, but breaking up the space actually makes it feel bigger and points to the coming trend of families craving multiple use spaces that can flex over time. (For now we are leaving the kitchen as-is while we dream and scheme about what we want - there are so many fun possibilities, but I can almost guarantee you it won’t be white!)


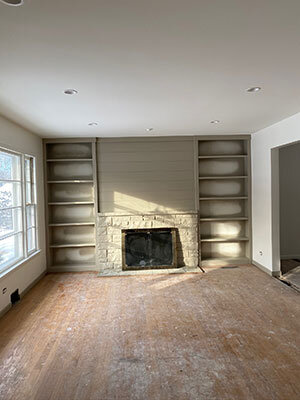
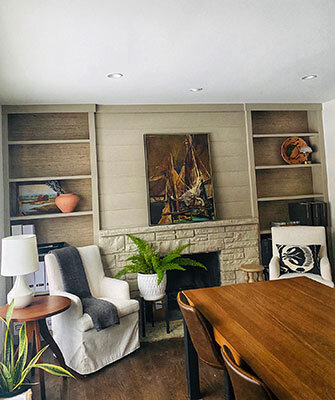
Aesthetically, our little fixer upper isn’t an architectural gem so in some respects we have a blank slate. That said, in our new conference room, there were existing built-ins with pretty simple millwork (ranch casing and slab doors) and to conserve budget, we didn’t want to take them out and start over. Enter the power of paint. In a room primarily for reviewing and sharing design work, we prefer a relatively neutral shell so the client presentations can shine. So, we chose to keep the walls white but used Farrow and Ball’s Light Gray for base, millwork, doors and the built-ins. “Gray” is kind of a misnomer for this color because it’s really a warm beige with a slight undertone of green. The effect is exactly what we were after - subtle, neutral and warm - while keeping the drama reserved for our design work. The built-ins were painted Light Gray too and the color on the existing stone feels natural; beefing up some of the trim elements added just enough finesse. The final touch was the addition of a gorgeous grasscloth to the back of the bookshelves - another layer of texture to keep the neutrality from getting cold, and a nice place to display a rotating cast of our vintage treasures.

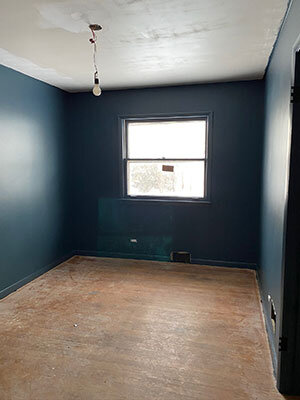
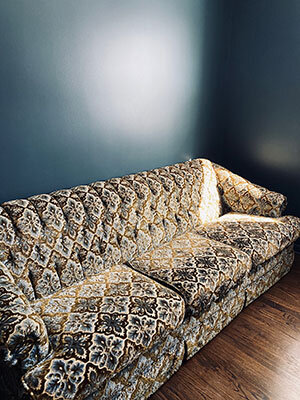
Because we see our studio as a design lab of sorts, we of course had to break out of the neutral shell at some point. The perfect place to do that was our back office. Enter a moody and sophisticated room with Farrow and Ball’s Hague blue on all walls, doors and casings (a trick we employ a lot when the millwork details aren’t meant to be highlighted), some killer wallpaper on the ceiling, a vintage sofa and more layers of fabric and trimmings in the works. This is truly my happy space and probably the truest expression of my own personal style. I look forward to experimenting with different color combos in here and letting my creative energies loose.
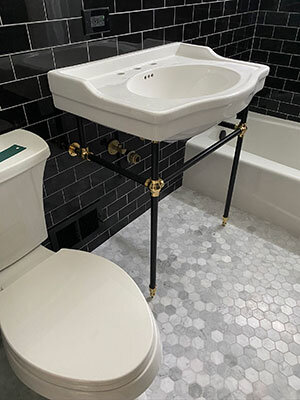
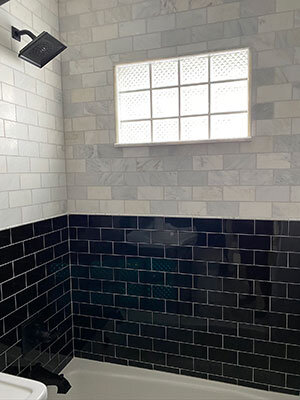
On to the bathroom! This plan was tricky - it is a small space in which we left the placement of all fixtures as-is, but everything else is new. We decided to glam this room up a bit with glossy black subway tile mixed with marble and brass. Again, keeping our budget in check meant getting the details right - splurging on a marble pencil tile trim and a stunning console sink that could shine while the more cost-effective materials and fixtures can recede. Of course, more wallpaper will be coming in here - we haven’t decided what direction that will take, but it’s nice to know we have a dramatic but neutral ground to play with different colors and patterns on the paper.

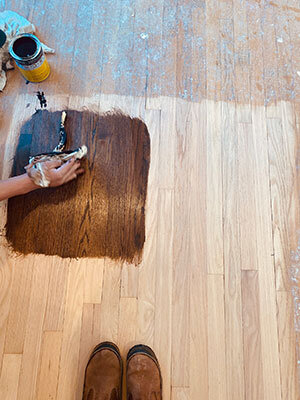
And, throughout the entire space, updating all light fixtures, adding some recessed lights and new matte black hinges and door handles makes a big difference. Red oak floors that were tired and dingy, absolutely sing with refinishing. Here, we stuck with a classic dark walnut that covers some of the pinky undertone that red oak can have and reads neutral so that we have the flexibility to pair lots of different furniture woods tones.

Phew, it is amazing to think we accomplished all of the above in 5 short weeks. (While designing for our clients among boxes, painters and the general mess that comes with moving.) We are enjoying settling in, getting organized and catching our breath before Phase II (and III and IV…). Thanks for joining us on this journey - its fun to share all the progress along the way with you!
Best to you all, hang in there - spring is coming.

PS - As luck would have it, the attic turned out to be a treasure trove of amazing finds. I mean, what collection would ever be complete without…